


Vhozite
-
Posts
2,994 -
Joined
-
Last visited
Posts posted by Vhozite
-
-
On 5/5/2023 at 6:24 PM, misterBee said:
This thread is for GAME DISCUSSION ONLY!
If you want to talk about non-SF6 stuff you are now required to use the Fighting Game Lounge thread:
Or you can go over to General Discussion. There's a lounge thread in there too.
Not trying to be a party pooper but with SF6 roughly 2 weeks out I’d like this thread to stay for used on that game.
-
10 minutes ago, Daemos said:
The Press Release/FAQ is very upfront and detailed. Appreciate that from any company.
Link?
-
You have chosen war with a god
-
8 hours ago, DoctaMario said:
Why do Jeep owners have a manger's worth of figurines on their dashboard? I've noticed this is mainly a Jeep owner thing, I never see anyone else doing this.
Because how will other people know how quirky you are if you don’t have every square foot of your Heep molested by some kind of personalization or mod.
- DoctaMario, J-ride and JGreen
-
 3
3
-
Do I need to do anything special to play the beta? I get that it’s “open” but do I just download it from Steam on the 19th and that’s it?
Edit: You can download it now from the SF6 page, tho i assume it’s not playable
-

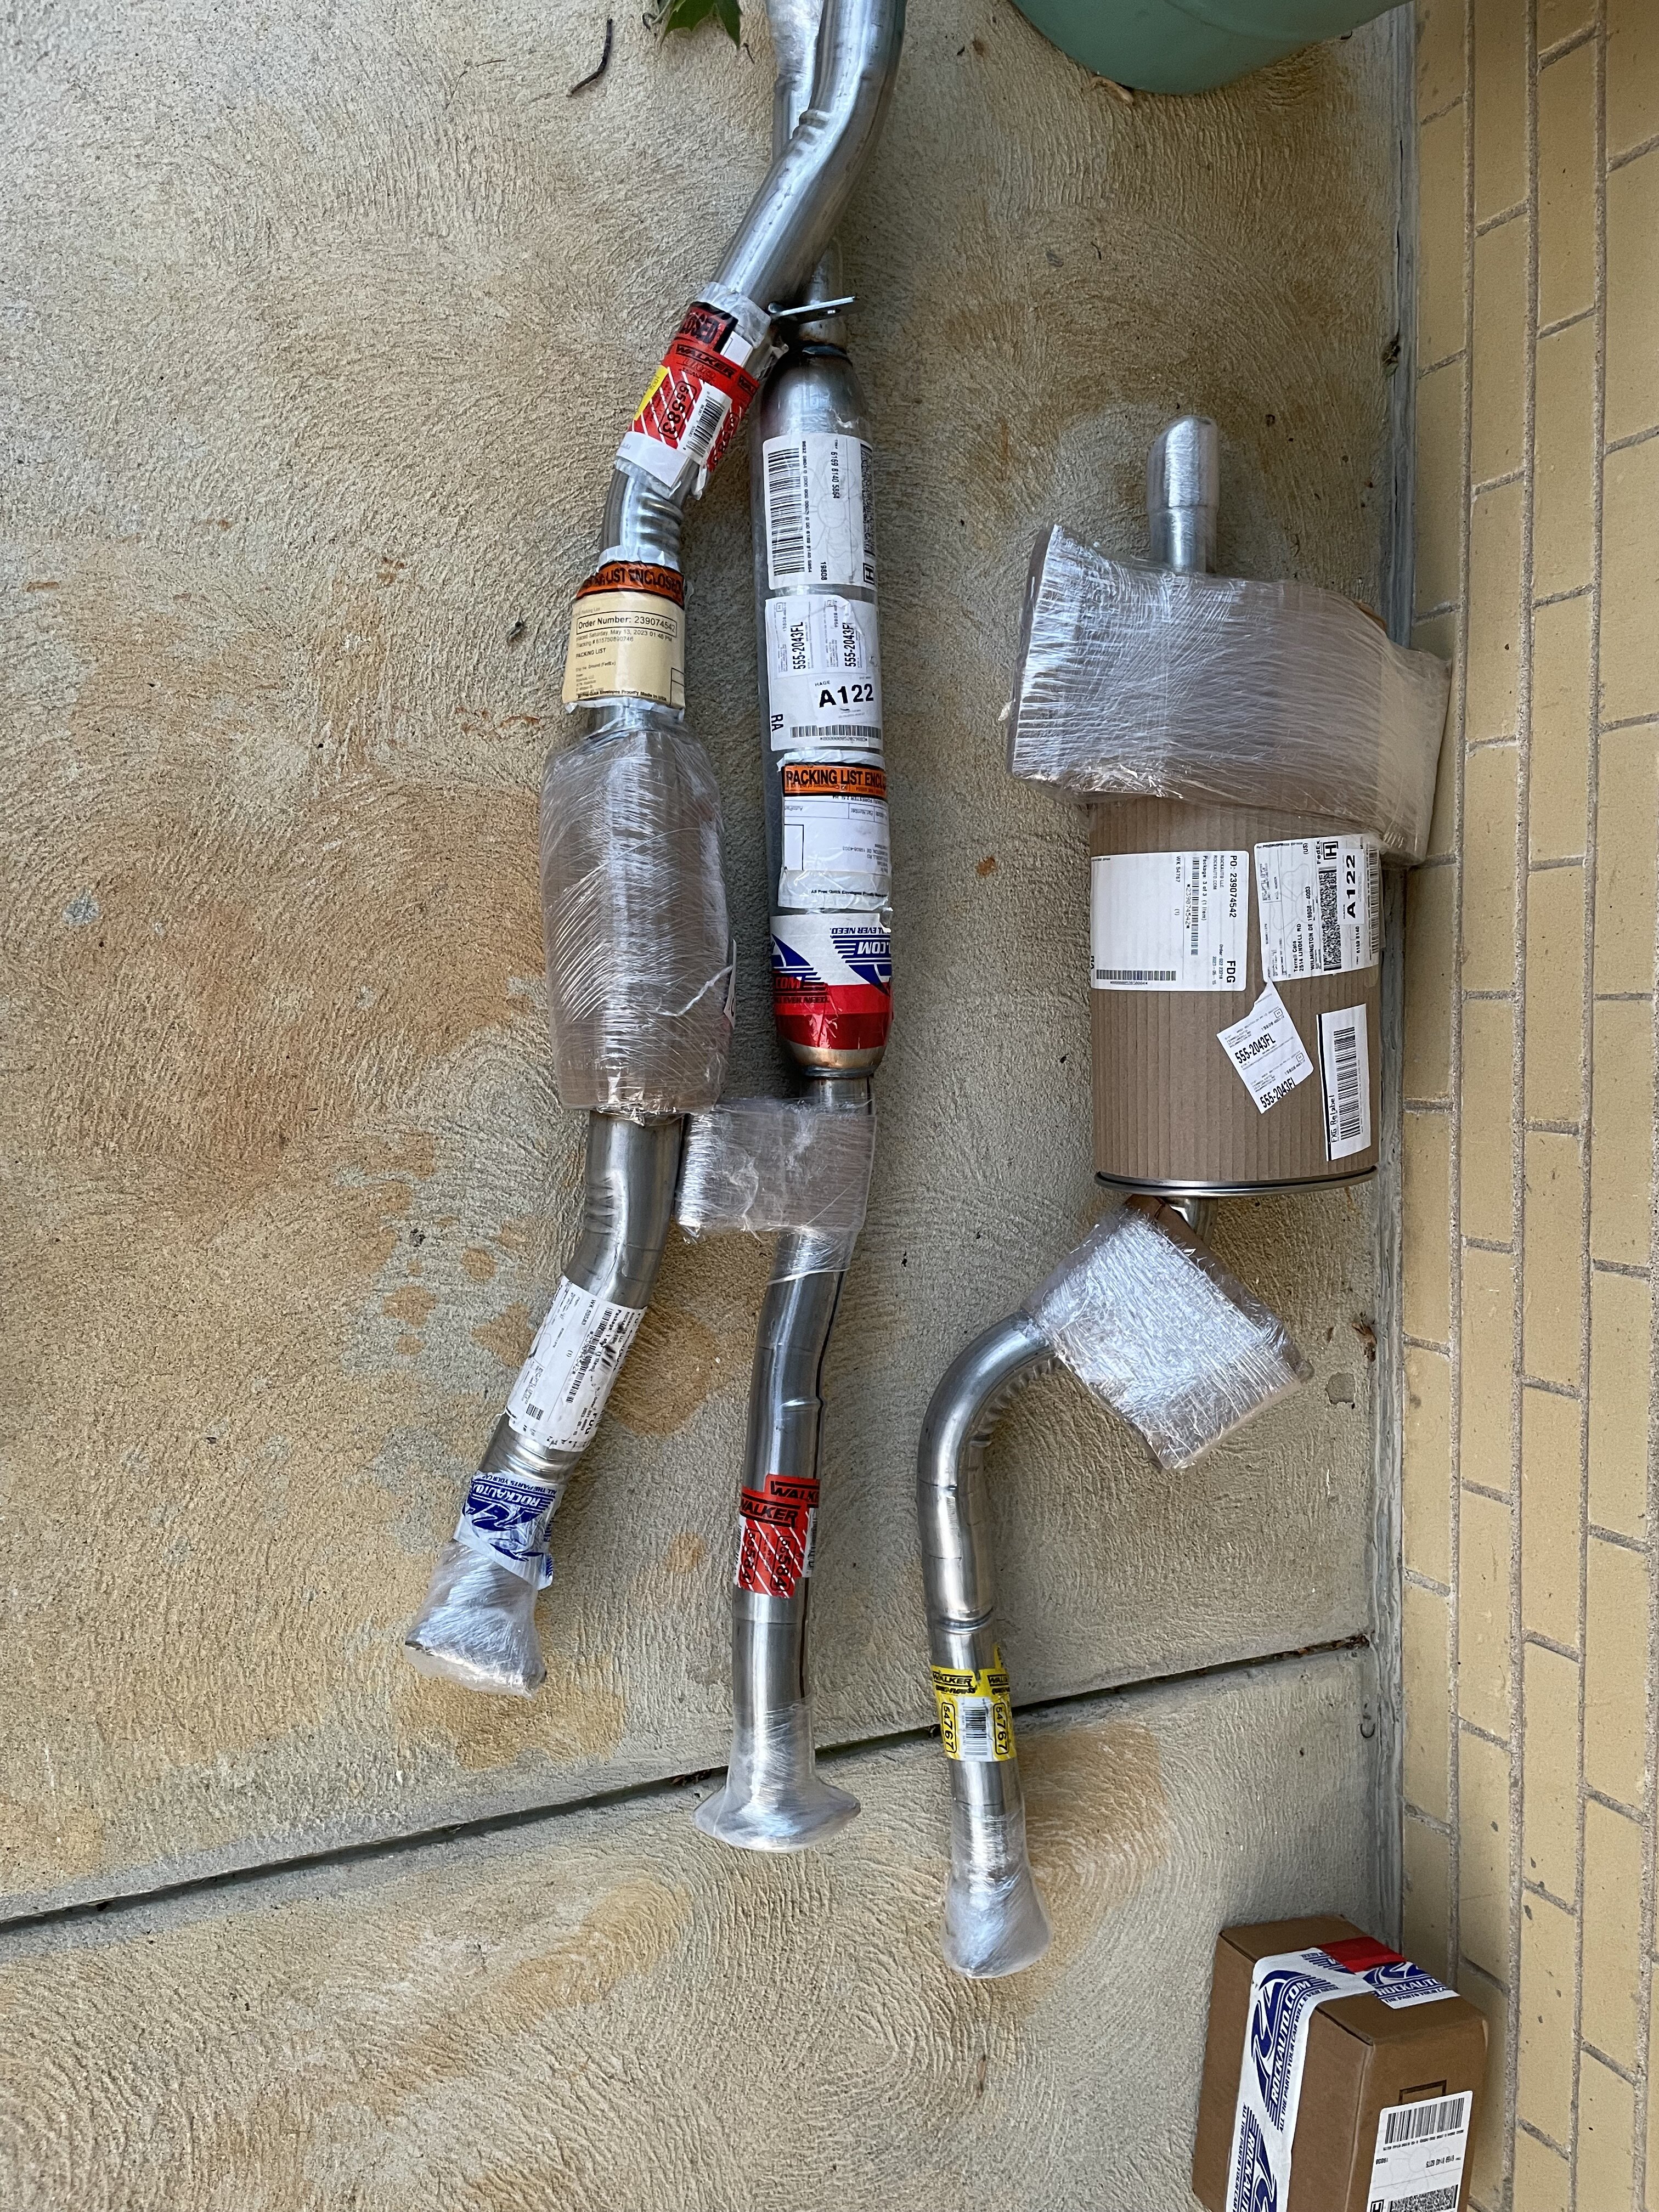
Exhaust parts for my Subaru are (mostly) here and vacation coming up in a few weeks. Between this and the front brake parts sitting in the trunk I’m ready to get down to business.
-
12 minutes ago, TWINBLADES said:
I'm sorry Manon... it looks like the reign of white women is over...
Reported for impersonating a member of our community.
- Phantom_Miria, Hawkingbird, TWINBLADES and 5 others
-
 1
1
-
7
-
33 minutes ago, Hawkingbird said:
This guy made an accurate Ice Spice in the character creator
You thought I was feeling you? That nigga a scrub…
- Bigtochiro, Illwill88, Hawkingbird and 1 other
-
4
-
18 minutes ago, Maravilla said:
Well if you can counter a drive impact with another drive impact what's stopping everyone from just waiting till their opponent does one first? I'm confused.
The situation you’re describing is exactly why you shouldn’t just constantly throw out raw drive impact without a read.
However, in a real match you only have so much mental bandwidth to spare when waiting to react to something. For example, while you are waiting to counter your opponent’s drive impact, they might be able to dash up and throw you because your mind was focused on something else. Basically you can sit there and do nothing waiting to blow up a drive impact, but in doing so you’re surrendering a lot of game control and momentum to your opponent.
-
Fighting Manon
Overview/General Strategy
SpoilerManon is grappler and highly momentum-based character due to her medal system. While most of the attention goes to her SPD-esque command grab, it is important the you take note of Manon’s other tools. Most notably she has target combos that can suck the opponent in to close range on contact for mix-ups. Manon also has a robust arsenal of normals which allow her to poke, anti-air, and whiff punish with the best of them. Many of her buttons have long range or move her forward, giving her deceptively far reach and better neutral presence than most characters of her archetype. This is a character that excels at blowing up mistakes.
Her biggest weakness is her momentum-based mechanic acts as a double-edged sword. The longer you can deny Manon medals, the easier it is to beat her down the line. Manon’s combos are not particularly impressive, and without medals or burning lots of meter her damage output it relatively low. Offensively speaking Manon has 0 plus frames on block without extra advantage from drive rush or meaties, and several of her knockdowns leave her fairly far away. This combined with using her decent OD moves means Manon can be pretty meter hungry…she will struggle if you can make her burn resources to fight you. Lastly, Manon’s reversal ability is below average. She has no DP from drive gauge and her SA1, while strike/throw invincible, is slow at 10f startup.
-
Avoiding the grab
SpoilerProbably the main reason you are here. There are 3 main things you can do to help yourself avoid her command grab;
Back-dashing instead of jump out when you expect a grab: Back-dashing is less risky than jumping as it takes fewer overall frames to recover and it leaves you relatively close to punish a whiff. Jumping is easier, however it can make punishing awkward if you jump away and it’s much easier to blow up if baited or you make the wrong read.
Make the Manon player condition you/prove they actually have combos and pressure: You should only be getting scooped if you know the other guy is capable of punishing you for trying to escape. Early on without medals or resources Manon’s damage output isn’t super high, so it’s important to test the waters early. You might eat a small combo trying to escape grabs, but it’s important that you show your willingness to escape and the Manon player shows they can tag it, because it influences the guessing game going forward. If the Manon player has sloppy pressure or no combos don’t give them the respect they need to land command grabs.
Understand the risk/reward when guessing in a mix-up: Mix-ups are often called “50/50”, but in a real match you can make observations that help move odds in your favor or pick options based on what puts you at the least risk even if you do pick wrong. For example, if Manon has you in a strike/throw mix-up but she is low on meter, you might opt to back-dash out since it will avoid a throw and even if you get hit you know her combo won’t do a lot of damage. If you are sitting on meter and the Manon player has never attempted to bait a reversal, it’s probably worth it to DP. Of course, there is never an answer that will get you out 100% of the time, but it’s important to understand that people are not robots and real matches have circumstances that will tilt outcomes one way or another.
-
Vacuum Target Combo breakdown
SpoilerManon has 2 target combos that will vacuum you in on contact to that she can force you into a mixup; st.mp>mk and st.hp>hp. On hit both of these target combos leave Manon at slight advantage right next to you, however on block both target combos are punishable. It is important you blow up any player not hit-confirming into these options. On block both Target Combos are always true blockstrings.
- St.mp>mk (+2 on hit/-5 on block): The lesser of the two; less advantage on hit and much harder to confirm into. If you are in burnout it becomes safe on block at -1.
- St.hp>hp (+3 on hit/-8 on block): One of Manon’s best tools. St.hp is far reaching, safe on block, and can be easily one hit confirmed into the target combo. If you ever eat this on block punish it, as its always on unsafe (even in burnout). However, since any decent player will be confirming into this, you will mostly be fighting back by countering her st.hp. This button is on the slower end at 10f startup, and has pretty high recovery at 20 frames. At maximum range if it counter hit’s an extended hurtbox sometimes it will not have the range to pull you in, which can make it worth trying to challenge against a player who throws it out a lot
-
Stop jumping
SpoilerUnless you really have a read on something (grab, st.hk, etc.), jumping against Manon is very ill advised. She can AA just as good as any character in the game with multiple ironclad anti-airs that grant her enormous reward on hit. It cannot be overstated how much feeding you can do recklessly jumping at Manon.
- Cr.hp is the first half of a target combo that will splat you on the ground right in front of Manon and immediately puts you into a 50/50.
- Df.hk is a normal similar to Dee Jay slide. It has very high active frames and on hit it side switches, allowing Manon to escape the corner and turn the tables.
- Rond-point (wheel kick special) is functionally a DP for AA purposes. The OD version actually allows Manon a juggle combo on hit which she can easily convert into a hit-grab and medal.
- SA2 is fully invincible, has an absolutely gigantic AA hitbox, does big damage, and corner carries a little under half stage.
It might be tempting to try jumping in some mix-up situations to avoid the command grab. However, you must be careful trying to jump out of her mix-ups. As mentioned in the “Avoiding the grab” section, get into the habit of back-dashing out of mix-ups if you expect a grab. This is safer than jumping out and still leaves you in range to a punish a whiffed command grab.
-
Neutral Notes:
Spoiler- L/H/OD Dègagè mid-screen “mix-up”: Manon is capable of tagging you with either a low or an overhead at pretty much any time from mid-screen. The low is super unsafe but knocks down, the overhead is slower and very minus (but hard to punish w/ spacing), and the OD overhead is slowest, but safe on block and can lead to a modest combo on hit if done deep enough. Occasionally block low to dissuade random slides while staying on the lookout for the overhead.
- St.hk: This is Manon biggest button. On top of the enormous range, it also moves Manon forward and when spaced it’s very much safe on block. However, it has very slow start-up (15f) and very long recovery (26f), making it incredibly minus on whiff (over -40 on whiff). This combined with no cancelable properties means it’s very susceptible to Drive Impact. Lastly, the reward on hit for Manon is poor, as without a punish counter the move leads to nothing and is actually slightly minus on hit (-2).
- Advancing Normals: Manon st.mp, st.mk, cr.mk, b.mk, st.hp, b.hp, st.hk, cr.hk, and df.hk all move her forward. This gives her buttons deceptively long range in neutral and it makes her great at whiff punishing. However, this same strength can also be a weakness, as these same buttons are also easier to punish if she does whiff them.
- Amazing anti-airs: see the “Stop Jumping” section for more details. TLDR Manon is very capable of protecting the French skies.
- Renversè against projectiles: Renversè is Manon’s anti-projectile tool. She can hold the button to briefly spin around a fireball, but she also has a kick follow-up with far reach that can be used if she catches you slipping. The OD version of this move is full upper-body invincible, which makes it capable of countering certain non-projectile attacks (coughHondacoughHeadbuttcough).
- Whiff punish goddess: St.lk, st.mp, st.mk, st.hp, cr.hk, SA1, and SA2 are all very capable whiff punishers due to their relative range and speed.
- Dealing with SA1: Be aware that this move is a low, so make sure you crouch block it. Outside of that this move is strike/throw invincible and it has 10f start-up. While that is fairly slow for use as a reversal, take note that in those 10 frames this move travels roughly 75% of the screen. Be on the watch for Manon players buffering this to catch you slipping. However, it is not projectile invincible.
-
Attacking Manon
SpoilerWeak defense/wake-up options: Manon has poor options on defense. She has no OD reversal, and her SA1 is slow at 10f startup, making it susceptible to safe meaty light buttons from numerous characters. This list includes:
SpoilerAKI - st.lp/cr.lk
Blanka - st.lk/cr.lp
Cammy - st.lp/cr.lp/cr.lk
Chun-Li - st.lp/cr.lp
DeeJay - st.lp/cr.lp
Dhalsim - st.lp
Guile - st.lp/cr.lp
Jamie - st.lp
Juri - st.lp/cr.lp/cr.lk
Ken - st.lp
Kim - st.lp/cr.lp/cr.lk
Rashid - cr.lp/cr.lk
Ryu - st.lp
Zangief - cr.lp
-
-
Combos
This section is not intended to be comprehensive, but it hopefully will be a good reference for your optimal routes and as a guide to know what’s possible. Some opening notes:
-
First number in parenthesis is damage, then hit advantage if listed
-
All combos ending in HG’s are +15 hard knockdowns.
-
Generally b.hp routes do more damage than b.mk>mk routes
-
Generally speaking, Super Art cancel rules are as follows:
-
SA1 can be canceled into from normals
-
SA2 from normals and OD moves
-
SA3 from normals, meterless specials, and OD’s
-
-
All combos ending in HG’s can be canceled into SA3 for extra damage
-
All combos ending in SA3 are +16 hard knockdowns
-
SA3 combo values are all non-CA numbers
-
Bread and Butter Combos
Spoilercr.lp>st.lp xx Ballet
- Light confirm/4f punish
- End in L.Ballet (1370/+21 KD) for okizeme, M.Ballet for corner carry and damage (1530/+33 KD)
- First light can be swapped with cr.lk for a 5f low starter (slight dmg decrease)
s.lk xx H.Wheel (1020/+37 KD)
- Fast whiff punish/buffer with decent range
st.mp/cr.mp/st.mk xx L.Ballet (1600/+21 KD)
- Whiff punish/buffer from your longest cancelable buttons
b.hp xx M.Spin>HG (2200-2800/+15 HKD)
- 8f punish for meterless damage and medal
st.mp>mk (1100/+2)
st.hp>hp (1400/+3)
- Vacuum effect target combos into strike/throw mix
cr.hp>hp (1100/+16-20 KD)
- anti-air target combo
Spin>K, Ballet
- L.Ballet: 1800/+23 KD
- M.Ballet: 2000/+33 KD
-
Conversion from an anti-fb tool
(PCH) DI, b.hp xx M.Spin>HG (2580-3000/+15 HKD)
(PCH) DI, CG (2560-3920/+19 HKD)
- Punish Counter DI combos to gain medals
(PCH) st.hk, L/M.Ballet
- L.Ballet (2080/+21 KD) - oki
- M.Ballet (2280/+33 KD) - damage/corner carry
-
Drive Gauge Combos
Spoiler(AA) OD Wheel, Spin>HG
- AA conversion into a medal
cr.lk>st.lp xx OD Wheel, L.Ballet (1810/+23 KD)
-
Low, light conversion burning a couple bars.
-
L.Ballet can be swapped for M.Ballet for corner carry and damage, but no oki midscreen if they backrise. L.Ballet ender has small frame advantage, but leaves the opponent much closer
cr.lk>st.lp DR st.lp, b.hp xx M.Spin>HG (1860-2166)
-
Expensive light confirm path to a medal
St.mp/cr.mp/st.mk DR cr.mp, b.hp xx M.Spin>HG (2480-2834)
- Medal conversion path from your main cancelable pokes
st.mp DR, b.hp xx Spin>K, df.hk (2262/+2)
- Side switch combo
b.hp DR, cr.mp, b.hp xx M.Spin>HG (2680-3034/+15 HKD)
- Max damage drive rush route into medal
OD.Ballet, s.lk xx H.Wheel (1600/+37 KD)
- Range dependent combo, but works if it hits crouching or standing
OD.Ballet, st.mp>mk (1630/+2)
- Crouch dependent combo
OD.Ballet, s.lk DR, st.lp, b.hp xx M.Spin>HG (2213-2465)
OD.Ballet, s.lk xx OD.Wheel, M.Ballet (2320/+33 KD)
OD.Ballet, s.mp DR, cr.mp, b.hp xx M.Spin>HG (2630-2882)
-
Super Art Combos
SpoilerCr.lk>st.lp xx SA
- SA1: 2070/+7 KD
- SA2: 2630/+32 KD
- SA3: 3470 (you can add a H.Wheel here to make it easier, but it does less dmg)
s.lk/st.mp/cr.mp/st.mk/*st.hp* xx SA1-3
-
Whiff punish stuff
b.hp xx SA3 (4600)
-
SA1: 2800
-
SA2: 3500
-
SA3: 4600
(adding a HG before the SA3 does less damage [4000]due to scaling
Spin>K, SA1 (2800/+7-11 KD)
- SA conversion from an anti-fb tool
(PCH) DI, SA
-
SA1: (PCH) DI, b.hp xx SA1 (3000/+7 KD)
-
SA2: (PCH) DI, b.hp xx SA2 (3490/+32 KD)
- SA3: (PCH) DI, b.hp xx SA3 (4200)
(PCH) st.hk, SA (3080/+8 KD)
- Punish Counter conversion with super
- SA1: (3080/+8 KD)
- SA2: (3780/+32 KD) - does not combo from max range
Cr.lk>st.lp xx OD Wheel, SA1 or SA2
- SA1: 2510/+11 KD
- SA2: 3000/+34 KD (you get 3 more frames of kda if you link SA2 instead of canceling into it)
-
Corner Combos
SpoilerStarter xx OD Wheel, OD Wheel, M>Spin>HG
Starter xx OD Wheel, OD Wheel, M. Ballet, SA1/SA2
Starter xx OD Wheel, OD Wheel, PDR, b.hp xx H.Spin>HG xx SA3
-
-
STRATEGY
-
Movelist Breakdown
SpoilerNormals/Target Combos
Spoiler* st.lp: Chainable, cancelable 4f button with good hit advantage. Good for defense, frame traps, and combo fodder. This button combined with drive rush gives you hit grab combos from lights.
* cr.lp: See st.lp; less advantage, more range
* st.mp: Safe, advancing, cancelable, fairly active poke. Decent oki tool. First hit of the st.mp>mk target combo
* cr.mp: Safe, cancelable poke. Very plus on hit
* st.hp: The party starter. Safe, long range, and one-hit confirmable into target combo for a mixup. Get familiar with this. SA cancelable
* cr.hp: primary anti-air; target combo followup
* b.hp: Only cancelable heavy and primary gateway for hit-grabs combos. Poor range, but safe and high active frames. Decent oki tool.
-
* st.lk: cancelable, safe light. Faster and a pixel longer than cr.mp, but less damage potential
* cr.lk: Fastest low. Chains into itself or jabs for pressure and combos, but otherwise unsafe on block
* st.mk: Longest cancelable button, but slower and more recovery than medium punches. Unsafe if blocked close
* cr.mk: Decent low poke. No cancel, but safe on block and pretty active for a low. Situational meaty
* b.mk: anti air; first hit of b.mk>mk target combo
* s.hk: Longest poke used to keep the opponent honest at range. Safe on block if spaced, but slow startup and minus on hit without PCH. Decent but don't spam it
* cr.hk: Pretty typical sweep. Good range, low, knocks down, but very unsafe on block.
* df.hk: Strange AA that side switches on hit. Very active and very unsafe on block
-
* st.mp>mk: vacuum target combo that leads to a mixup on hit. Unsafe on block
* st.hp>hp: vacuum target combo that leads to a mixup. Slower than the st.mp version, but can be hit confirmed into, has more advantage on hit, and more range. One of your best tools.
* cr.hp>hp: AA target combo that splats the opponent on the ground.
* b.mk>mk: target combo that ends in a cancelable overhead.
-
* j.lp: highly active low hit/block stun jump-in and decent a2a
* j.lk: low hit/block stun cross-up. Minus on block if hit too high
* j.mp: a2a
* j.mk: cross-up 2. Also has the longest horizontal range of her jumping normals, making it also a good a2a and nj poke.
* j.hp/j.hk: Primary jump-ins. Punch is faster, kick has more range
-
Specials
Spoiler* Command Grab (Manège Doré/63214P): Grab special used for mixups and punishes. Does more damage the higher your medal level, and raises medal level upon successful grab. Take care to condition the opponent when going for this in a mixup. Extremely unsafe on whiff. Damage and kda is uniform across all versions.
- L: Farthest meterless range, longest startup
- M: Middle ground between light and heavy
- H: Shortest range, fastest startup
- OD: Longest range, medium version startup
* Wheel (Rond-point/236K): Kick special used for combos or as an AA.
- L: Fastest meterless startup, middle damage, highest recovery, lowest kda
- M: Middle startup, highest damage, middle recovery, middle kda
- H: Slowest startup, lowest damage, fastest recovery, highest kda
- OD: Fastest startup, heavy damage, juggles for combo extensions
* Ballet (Dègagè/214K): Kick specials with different uses depending on the version used
- Light: Fast, long range, double hitting low that knocks down. Used to clip opponents not blocking low in neutral. Very unsafe on block, but the nature of the move and the fact she has an overhead with similar properties makes this a mind game for the opponent just by existing. Also useful as a combo ender.
- Medium: Long range, forward moving kick. Mostly used in combos, however the speed and range makes it useful as an occasional punish tool. Unsafe on block
- Heavy: Long range, fairly fast overhead. Technically unsafe at -9 on block, but the range combined with proper spacing means this move is typically safe.
- Overdrive/OD: Safe but slighty slower version of heavy Ballet. Enough advantage on hit to combo. Notably the first active frame cannot hit a crouching opponent, however the second active frame will hit a crouching opponent and it will force them into crouching state if they happen to be standing.
* Spin (Renversè/236P): With different options depending on your input. The spin itself is projectile invincible. HG startup, fb I-frames, and damage all go up with version, and OD is upper body invincible.
- No additional input: Manon will strike the opponent with a fancy grapple. Similar to the CG, this move gains a medal on hit and also does additional damage the higher your level. Despite what the animation implies this move is a strike...it an be comboed into but it can also be blocked.
- Hold punch: Holding the punch button used to initiate the special will have Manon spin with no follow-up attack. Useful for going through projectiles without committing to an attack.
- Kick: Long reaching kick that comes out instead of the hit-grab. Useful as a situational poke or as a way to tag the opponents recovery after you spin past their fireball. High active frames and range make this typically safe on block (except OD) though it can be punished if done extremely close. Damage and startup is uniform for all versions.
-
Super Arts
Spoiler* SA1 (Arabesque/236236K): Strike and Throw invincible reversal with side switch. Slower startup for a reversal at 10f, but travels roughly half-screen pretty fast. NOT PROJECTILE INVINCIBLE.
* SA2 (Étoile/214214k): Strike and Throw invincible reversal. Faster startup than SA1, great AA, and can be canceled into from some OD moves.
* SA3 (Pas de Deux/236236P): High damage grab super. Unfortunately can be jumped post super-flash, but invincible and can be comboed into (notably from hit-grab).
-
Neutral tools
SpoilerAnti-airs:
- cr.hp(>hp)
- b.mk
- df.hk
- H.Wheel
- OD Wheel
- j.mp (a2a, knocks down)
Pokes:
- Special/SA Cancel: st.lk, st.mp, cr.mp, st.mk, st.hp (SA only)
- Target combo: st.hp(>hp)
- No cancel: cr.lk, cr.mk, st.hk, H.Ballet, OD.Ballet
Whiff punishes:
- Special/SA Cancel: st.lk, st.mp, cr.mp, st.mk, st.hp (SA only)
- Target Combo: st.mp(>mk), st.hp(>hp)
- No Cancel: cr.mk, st.hk, cr.hk
Anti-projectile tools: Spin (either alone or with k followup)
Parry Drive Rush
- st.lk: fast and good range with a couple plus frames
- cr.mk: low, s.lk link combo if hit deep enough
- st.mp: very plus ob, forward movement of st.mp gives extra range
- cr.mp: very plus ob, extremely plus (+10) on hit
- b.mk: target combo becomes a true blockstring
Other Neutral Stuff
- Use light ballet as a check for people who don’t block low
- OD.Spin is upper body invincible. Very useful to go through some attacks on reaction or as a hard read. Very unsafe on block if followups are used.
-
Offense
Note: Due to the nature of Drive Rush this section will not be comprehensive. This is mostly for the main stuff
SpoilerTrue Blockstring: cr.lp x 2 (-2 on block)
- PDR cr.lk>st.lp (-1 ob)
-
PDR b.mk>mk (-11, but cancelable)
- St.mp DR>st.mp (+3 ob)
- St.mp DR>s.lk (+2ob)
- b.hp DR>cr.mk (+2 ob/low)
- b.hp DR>b.mk (+1 ob)
- b.hp DR>st.hp (+1/>1 block DG drain)
-
Frame Traps
- Cr.lp>st.lp
- St.lp>st.lp
- cr.lk>st.lp
- b.mk>mk (-11 ob, but cancelable)
-
PDR st.lk>any light
- PDR st/cr.mp, any light
- st.mp DR>b.hp
-
Other mixups
- st.mp>mk: +2 on hit with Manon right in their face for strike/throw mix
- st.hp>hp: +3 on hit with Manon right in their face for strike/throw mix
- Opponent exists in neutral: L.Ballet/H or OD Ballet high/low mix
-
Okizeme
SpoilerTLDR this section: Mid-screen sweep, L.Ballet, and H.Wheel are your best knockdowns for real pressure alongside cr.hp>hp anti-air. In the corner pretty much anything but HG, CG, SA1, and SA3 gives great oki. DR can help in several situations but often it can be reversal'd for free. St.mp and b.hp are you primary meaties due to their high active frames and advantage when hit meaty.
-
Throw (+16): TLDR – use back throw instead or get a PCH. If they backrise there is no real pressure. You can meaty st.hk to force them to block but other than draining some drive you don’t get anything off it. Even with PDR there is no reason for them not to block as you cannot get close enough to force a guess without being unsafe, and any character with a DP (frames?) can tag you for free. You are in range for the good ole slide/overhead midscreen mix but otherwise if you want real oki here you want the hard knockdown from punish counter or the corner.
- NR/HKD/corner: Walk up meaty (st.mp,b.hp) or throw
-
B.Throw (+18): If they backrise midscreen you don’t get any pressure unless you PDR. However, using PDR Manon can force a strike/throw mix, as L.CG will scoop a wakeup jab if done immediately and you can get a real meaty off things like st.mp (+4 ob and close enough for another 50/50). However PDR does again lose to DP’s here for free. Otherwise with a hard kd/corner you’re close enough for regular walk-up meaty/throw mix. If you are bad at timing pressure you can whiff either jab to make yourself +2.
- NR/HKD/corner: walk up meaty/throw; whiff jab, +2 strike/throw mix
- BR: (if no DP)PDR into L.CG or meaty st.mp (+4 ob and in 50/50 range)
-
Sweep (+29 HKD): dash>meaty cr.mp (+1 ob/+8 oH) or dash>L.CG (beats wakeup button)
-
Cr.hp>hp anti-air (~+18-20): walk up manual meaty/throw mix
-
Command Grab (+19 HKD): no real oki. You can drive rush to get close enough to counter hit a wakeup jab or gimmick the opponent with a high/low but really they can safely block whatever you throw out.
-
L.Ballet (+21): walk up manually timed strike/throw
-
M.Ballet (+33): no oki if they backrise midscreen due to distance. In the corner, you are +12 after a forward dash, which makes b.hp auto-timed to be +2 ob. Alternatively, you can whiff a st.mp to frame kill and close a bit of distance…this will leave you +9.
- Corner: dash>meaty b.hp (+2 ob/+8 oH)
- Corner 2: whiff st.mp (+9), meaty st.mp (+2 ob/+5 oH) or L.CG (beats buttons)
-
Wheel (L/M/H = +31/+34/+37): Midscreen you want to combo into the heavy version as it leaves you the closest and also has the most KD advantage. After a dash you are easily close enough to force meaty/throw guess, as she is a whopping +16. In the corner you can use the medium version for the extra damage, at the expense of 3 less frames advantage
- Heavy: dash>manual meaty/throw mix
-
Spin>HG (+15 HKD): See oki notes under “Throw”. Meaty st.hk, drive rushing gets DP’ed for free. Corner doesn’t change the situation. Basically nothing here.
-
SA1 (+7): plus frames but too far for oki
-
SA2 (+32): weak midscreen oki on backrise…dash (+11) into meaty st.hp is about all you’re getting here due to distance. In the corner you can dash into auto-timed meaty b.hp or throw. Or you can whiff something to frame kill and still be plus enough for a mixup of your choice
- BR: dash st.hp meaty
- NR/corner: dash>meaty b.hp (+1ob/+7oH)/throw
- NR/corner 2: st.mk frame kill (+2), strike/throw mix
-
SA3 (+16 HKD): See “Spin>HG” oki section. Not much here
-
Tech
SpoilerGeneral
Spoiler-
Blanka
Spoiler-
Honda
-
JP
Spoiler -
Author’s Note: As of this date (June 18, 2023), I consider this guide to be 85% complete. There are some things I might add in the future if I decide to continue playing the character (not set on her being my main), but as of right now I plan on taking a break to relax irl and explore the rest of the game. If there are any errors or anyone has questions or requests, don’t be afraid to chime in. But for the most part I am done with this until a major patch drops.
Welcome to the Street Fighter 6 Manon Combo, Strategy, and Tech Thread

Game Version: 1.0
Change log:
Spoiler* 05/13/2023: Thread created (template)
* 06/02/2023: Thread changed to be Manon specific with relevant edits to the OP. Added some BnB's and a couple move breakdowns
* 06/05/2023: More notation added, finished move list breakdown section under Strategy.
* 06/06/2023: Started a modest tech section under Strategy. Added many more combos, added more version explanations for specials
* 06/08/2023: Added some corner combos, started "Neutral" section under strategy
* 06/10/2023: Added some combos involving EX overhead and spin>K
* 06/11/2023: Added another link, expanded neutral section and added offense section under Strategy
* 06/17/2023: Added okizeme under Strategy.
* 06/18/2023: Added "Fighting Manon" section. Guide is "complete" for the time being
* 07/19/2023: Small reorganization of the "Tech" section under Strategy, Added anti-jp tech, added link to Manon discord
* 01/27/2024: Added notes under "Fighting Manon" that I already had but never added to the thread. Added some text edits/spelling fixes
-
Useful Links
Spoiler-
Notation/Abbreviation Guide
SpoilerL - light
M - medium
H - heavy
OD - Overdrive
-
lp - light punch/jab
mp - medium punch/strong
hp - heavy punch/fierce
lk - light kick/short
mk - medium kick/forward
hk - heavy kick/roundhouse
-
s - standing
cr - crouching
f - forward
b - back
j - jumping
df - down forward
-
AA - anti-air
a2a - air to air
KD - Knockdown
HKD - Hard Knockdown
kda - knockdown advantage
CH - counter-hit
PCH - Punish counter-hit
xx - cancel
> - denotes a follow-up, such as from a chain or target combo (ex: Manon s.hp>hp target combo)
, - denotes a link (ex: cr.mp, s.lk xx L.Wheel)
DI - Drive Impact
DR - Drive Rush
PDR - Parry Drive Rush
SA1 - Super Art 1
SA2 - Super Art 2
SA3 - Super Art 3
-
Ballet - quarter circle back kick specials (Dègagè)
CG - Command Grab (Manège Doré)
Spin - Spin special with followups (Renversè)
- HG - Hit grab followup
- K - kick followup (Grand Fouettè)
Wheel - Wheel kick special (Rond-point)
- Volt, GetTheTables, Darc_Requiem and 3 others
-
 6
6
-
I drove stick for the very first time today. I was constantly stalling in a parking lot but I’ve never had so much fun at 15 mph lmao. I love it.
- Dayaan, Darc_Requiem and J-ride
-
2
-
1
-
I front loaded my fuck ups. Pissed away a full ride through community college then state school because I didn’t actually want to go to college, and even if I did I certainly wasn’t ready at 18. Changed majors like 3 times, and floated form dead end job to dead end job until I couldn’t finally hammer out a shitty associates in Solar lol.
Anyways, I’m on the job drafting now which makes me happy since it’s an actual skill, and as a bonus I’ve learned a lot about electrical stuff. Currently in the “apply yourself” phase but one thing I don’t like about my job it’s that I feel like I’m slowly approaching the ceiling of what I’m gonna learn here. I used to have a good mentor/manager who’s since moved on, and my new manager just doesn’t foster the same learning environment (he doesn’t know as much as the last guy). Nice guy and a hard worker but frankly just not a great leader.
-
-
2 hours ago, axeman61 said:
Programmer for a grant management company. I make money that's good for a single guy, but I feel below average for my profession at my time out of college.
If I was making the money I make now a couple years ago I would’ve agreed, but this inflation has made me feel like I have barely moved up. I make a little over $40k/yr with OT, and I feel like I been priced outta everything. It’s definitely more then the barely-above-min-wage I was making before, but it’s not as much as I thought lol.
I’m trying to stick it out at this place at least 3 years before getting something else since it’s my first job outta my 2 year school, but I’m feeling the pressure.
- Pair of Rooks, DoctaMario and J-ride
-
2
-
 1
1
-
The demo has world tour mode?
-
Without doxxing yourselves I’m curious what other Megashockers do for work. What job/role, general pay, career paths, benefits talk, past jobs etc.
I draft plans for solar arrays in Autocad at a small office. I like my job and it’s fairly stress free, but pay (more than I’ve ever made) doesn’t go as far as it did pre-COVID.
- DangerousJ, Jurassic, Volt and 2 others
-
5
-
6 hours ago, Hawkingbird said:
I'll go straight to combo trials with the characters I'm interested in playing. After I'm done with that I'll head to training mode for a brief time to get acquainted with their normals, the ranges and hitboxes then hit online.
Damn you’re right his is definitely what I do first. Combo trials are my favorite “mode” too
-
3 hours ago, Maravilla said:
What do y'all usually do when a new fighting game comes out? I've only played 3 but for those 3 I usually go into training for like 3 weeks before anything else, I try out characters, combos,etc. after I get comfy with the characters I choose I then go online in casuals.
1. Lab for a couple days/a week,
2. Fight a few matches with friends,
3. lab the things I need to patch up,
4. fight anyone
5. Repeat as necessary for every new character
- ToreyBeans and Doctrine_Dark
-
2
-
2 hours ago, delete_me said:
My day -21 prediction online tierlist:
Low rank nightmares: Marisa, Blanka, Honda
Mid rank nightmare: Gief
High rank nightmares: JP, Dhalsim
Ultimate omnipotent one-winged angel nightmare: Guile
Biggest army: Ryu, Ken
Most degen playerbase: Juri, Lily, Kim
Most refined playerbase: Manon, Cammy
Most wholesome playerbase: DeeJay
-
19 minutes ago, JGreen said:
What don’t you like about the mustang auto? Is it specific to the mustang auto or just autos in general? I’m a big fan of manuals and that’s my daily, but you’ll definitely have more car options that check off those boxes if you include auto.
It’s bad at almost everything that isn’t low rpm highway cruising.
At low speeds (think parking lot/neighborhoods) it’s super lurchy anything more than literally 10% throttle at ~5mph and the tranny will immediately start hunting for second gear. What ends up happening is that you get a few seconds of revving with no acceleration until the car slams you into 2nd.
In terms of fun factor the transmission programming sucks. The redline in my car ~7000 RPM, and the car will never rev above 2000 unless you’re giving it like 70% throttle…at which point it’ll shift at 3000 lol. Anything higher and you gotta be a WOT, and letting off the gas even a tiny bit it’ll revert right back to granny mode upshifting prematurely. If you’re already in over drive and you give it some gas you either get no balls until you force a downshift, which takes about 10 years.
-
Thinking about taking the manual plunge and getting a WRX. I like the convenience of automatic but the WRX is the only car that checks all my other boxes
4 doors
AWD
Sporty
Not terrible on gas
Big aftermarket
Not super heavy or large
The Mustang is great but I don’t like how much I’m spending on a 12 year old car that isn’t particularly fun to drive (in very large part to the auto trans).


The SF6 Thread: Guest Characters? In MY Street Fighter?
in Fighting Game Discussion
Posted
What time will the beta open?